📝 How to Add a Submission Form
This guide will walk you through adding a front-end post submission form using the Easy Post Submission plugin.
No special theme is required, just a working WordPress site with the plugin installed and activated.
🚀 Steps to Add a New Form
1. Open the Plugin Interface
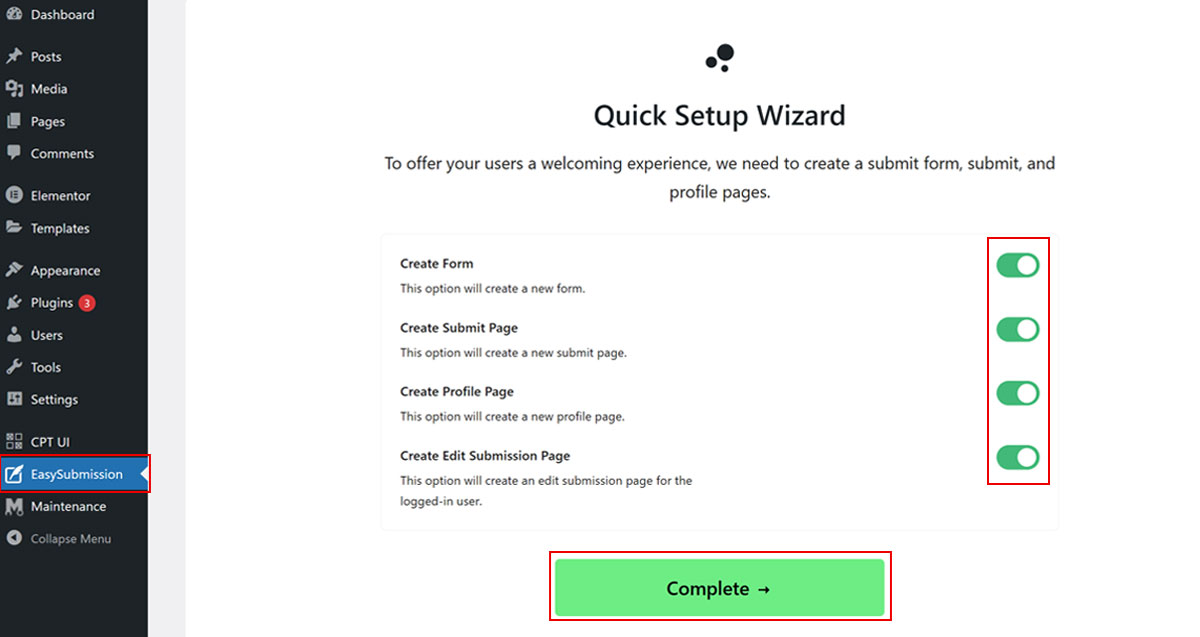
In your WordPress dashboard, go to Easy Post Submission (in the left-hand menu)
This opens the Ruby Submission Admin interface. Select option what you want and click Complete
2. Go to the Forms Overview Tab
Click the Forms Overview tab at the top of the interface.
This is where you’ll manage all your submission forms.
3. Click "Add New Form"
Press the Add New Form button to begin creating a new submission form.

4. Enter a Title and Save
Type in a name for your form in the title field. Then click Save New Form.

5. View the New Form
Your new form will now appear at the bottom of the list under Your Forms.
Each form has a shortcode you can copy and paste into any WordPress page or post to display the form.

📌 What’s Next?
Now that you’ve added your form, you can:
- Customize its fields and settings
- Copy the shortcode and place it anywhere on your site
- Start collecting user-generated posts
🛠 Troubleshooting
- Make sure Easy Post Submission is installed and activated
- Try refreshing your dashboard
- Look for the menu item labeled Easy Post Submission in the sidebar
Need help? Check out the FAQs or Contact Support.