📦 How to Install Easy Post Submission
This guide will help you install and activate the Easy Post Submission plugin.
This is a simple way to allow users to submit posts from the front end of your WordPress website.
✅ What You Need
Before you start:
- ✅ A working WordPress website
- ✅ Administrator access to your WordPress dashboard
- ✅ Internet connection (to download plugin from WordPress.org)
🚀 Installation Steps
You can install the plugin directly from the WordPress admin panel.
1. Go to Plugin Manager
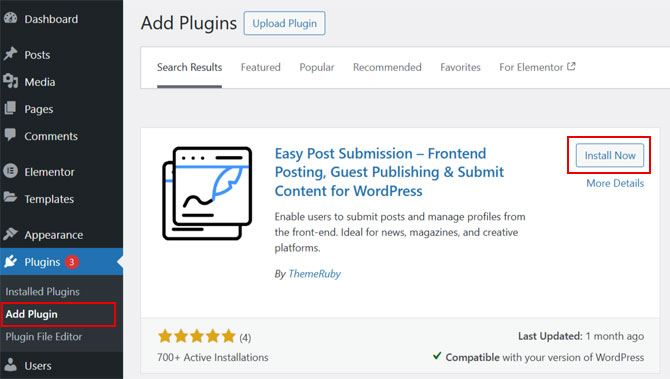
Open your WordPress dashboard and navigate to Plugins → Add Plugin.
This will take you to the plugin installation screen.
2. Search for the Plugin
Use the search bar in the top right corner and type Easy Post Submission.

You should see the plugin appear in the results.
3. Click "Install Now"
Once you find the plugin, click the Install Now button.
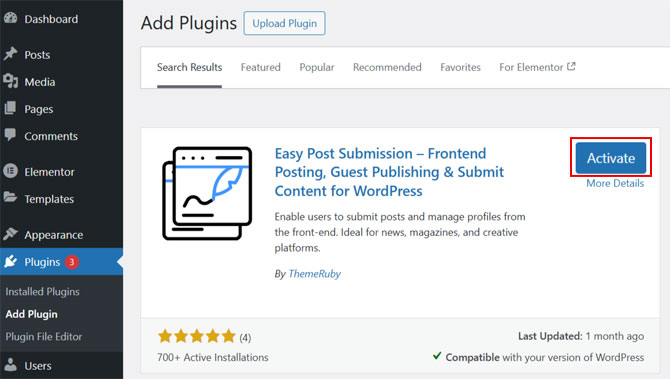
4. Click "Activate"
After installation is complete, click the Activate button to enable the plugin.
🔄 What to Do After Activation
Once the plugin is activated:
- A new menu or settings panel may appear in your dashboard
- You can start configuring the submission form
Try refreshing the WordPress admin page. Some plugins need a reload to show updated items.
🛠 Troubleshooting
If the plugin doesn’t appear in search results:
- Double-check the spelling: Easy Post Submission
- Make sure your WordPress version is up to date
- Visit wordpress.org/plugins and download it manually
- Then upload it via: Plugins → Add Plugin → Upload Plugin
Need help? Check out the FAQs or Contact Support.